So before getting started on migrating our site, let’s clear up some basics. Firstly, most WordPress sites are made up of 3 components, the WordPress core files, the wp-content folder and the database. The core files we can get by simply downloading them from wordpress.org, so we will not be moving these around. The wp-content folder is all of the user uploaded content like themes/plugins and images, this is a very important folder to keep. Finally, the database, this we will backup from the hosting control panel. Directions to get to the database management tool may be different in some cases, but the idea is the same, get an SQL backup. While dealing with the files, we don’t have to worry about the database, because it is not accessible from the file manager.
Step 1. Creating a backup of the site.
Compressing the wp-content folder is a good way to cut down on download and upload time and also can prevent file corruption or loss, so lets start there. From cPanel home click on the file manager,
If you get a window asking which directory would would like to go to, select Document root for: and select your site from the drop down as shown.
annnnddd GO
Once inside your websites root, locate the folder called wp-content, right click and select compress.
Select your preferred compression type. I prefer GZiped Tar Archive, but any will work for what we are doing. click on compress file(s). Once the compression has completed, download the file and let’s move on to the database.
Pro Tip: If you have more than one WordPress site on your hosting account, now would be a good time to right click on the wp-config.php and take note of the database name, should be something like:
define('DB_NAME', 'this_is_the_name_of_your_database');
From cPanel main, select phpMyAdmin,
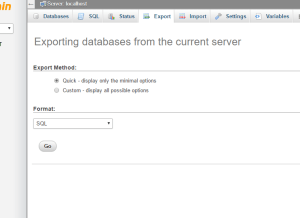
Once there, select your database from the list on the left then from the navigation bar, select export.
From here just hit the go button and that will start a download of your database SQL file.
Congratulations! You officially have a backup of your website. Let’s move onto step 2, setting up our destination server.


